- Supplies Required
- Preparation
- Step 1: Setup (5 minutes)
- Step 2: Prime the Models (5 minutes)
- Step 3: Base Coat (5 minutes)
- Step 4: Brown Camouflage (7-8 minutes)
- Step 5: Gray Camouflage (7-8 minutes)
- Step 6: Apply Wash (10 minutes)
- Step 7: Flat Coat (5 minutes)
- Step 8: Detail Cannon and Tracks (10 minutes)
- Step 9: Tear Down and Cleanup (5 minutes)
Painting Three QRF 15mm BMP-2s in 1 hour: A Speed Painting Tutorial
My painting techniques are focused on obtaining the best results while spending minimal time. I’m a gamer, not a modeler. My preferred scale for modern ground combat is 1/285 (6mm) scale and my techniques are optimized for that scale. However, these techniques can be adapted to other scales. In this tutorial, I’ll show how to paint 3 QRF 15mm BMP-2 models in one hour. Note — these models are 14 years old. I have no idea if these are the same models QRF now sells.
Supplies Required
- 3 15mm QRF BMP-2 models. These models are 14 years old and were originally assembled and painted in 2001 — oddly enough, on the day that the US began bombing the Taliban in Afghanistan.
- Paint Stripper. These models were painted 14 years ago and needed to be stripped first. I use Purple Power cleaner for this.
- Paint. I decided to paint these models in the desert camouflage scheme of my imagi-nation, the Kingdom of Austral. The colors used are Vallejo Model Air Desert Sand, Citadel Mechanus Standard Gray and Citadel Talarn Sand. I could have decreased the painting time by using all Vallejo Model Air colors, but I wanted to remain consistent with my 6mm Austral models. For guns and tracks, I used Vallejo Model Colors Black, old Citadel Mithril Silver and old Citadel Boltgun Metal. My “go to” dull coat is Testors Model Master Acryl Flat Coat. My primers were Testors Model Master Acryl Primer White and Vallejo Black Surface Primer.
- Thinners, Cleaners and Washes. I use Liquitex Airbrush Thinner to thin acrylic paints for airbrushes. I use denatured alcohol to clean the airbrush between colors and Vallejo Airbrush cleaner to clean the airbrush at the end. For the wash, I use a custom wash made from Future Floor Wax and Vallejo Game Color black ink.
- Tools. I used my trusty Grex Tritium TG3 gravity feed, pistol grip airbrush. As always, paper towels come in handy when working with an airbrush and when using washes.
Preparation
As I noted, these models were painted in a hurry 14 years ago:
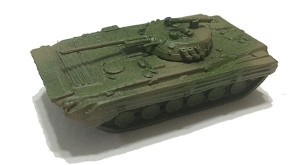
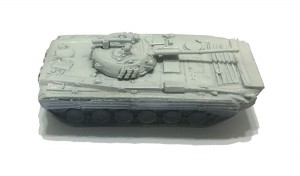
Not awful, but not great either. We were preparing for a massive Fistful of TOWs game, the Battle of Fargen Gap and I had to get these done quickly. So I soaked the models in Purple Power for a couple of hours, then scrubbed them with a toothbrush. The stripped models looked like this:
Step 1: Setup (5 minutes)
Before starting, I assembled all materials and tools I’d need — paint, washes (already pre-mixed), thinners, etc. — and cleared the workspace. I ran alcohol through the airbrush to make sure it wasn’t clogged.
Step 2: Prime the Models (5 minutes)
I primed the track assemblies with Vallejo Surface Primer Black. I wasn’t planning to spend much time detailing them, so I hoped this would give them some depth. I then primed the rest of the model with Testors Model Master Acryl Primer White. I placed each model in front of a fan to speed drying. After each color, I shot alcohol through the airbrush to clean it.
Step 3: Base Coat (5 minutes)
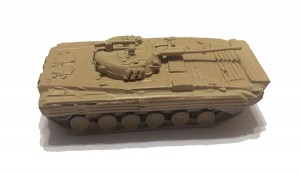
The base coat is Vallejo Model Air Desert Sand, sprayed on with the airbrush. Model Air colors require no thinning, so they are easy and fast to work with.
Step 4: Brown Camouflage (7-8 minutes)
I thinned the Citadel Talarn Sand, which took a little extra time. As I said, I could have used Vallejo Model Air colors exclusively, but I wanted to stay with an establish camouflage scheme. Then I sprayed a very basic camouflage pattern. (If this wasn’t a speed painting exercise, I would have spent much more time fiddling with the camouflage).
Step 5: Gray Camouflage (7-8 minutes)
I thinned the Citadel Mechanus Standard Gray, which also took a little extra time. Then I sprayed a basic camouflage pattern. (Again, if this wasn’t a speed painting exercise, I would have spent much more time fiddling with the camouflage).
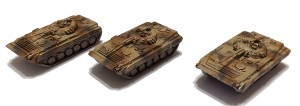
Comment — The camouflage turned out a little more subtle than I like and the patterns are pretty crude. But it actually looks pretty good on the table.
Step 6: Apply Wash (10 minutes)
Using my pre-mixed wash, I applied the wash to each model, being careful to keep it from pooling on the large flat areas. The wash takes awhile to dry, so I took a break and had supper.
Step 7: Flat Coat (5 minutes)
I sprayed the models with Testor’s Model Master Acryl flat coat.
Step 8: Detail Cannon and Tracks (10 minutes)
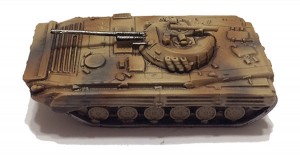
To give the model some visual interest, I painted the cannon and machinegun Vallejo Model Colors Black. I then brushed them with a 50/50 mix of old Citadel Mithril Silver and old Citadel Boltgun Metal. The same treatment was given to the tracks. This completed the models:
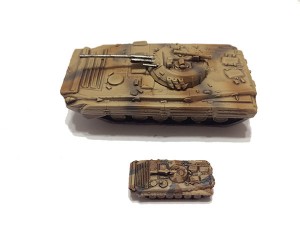
This is a QRF 15mm BMP-2 compared with a GHQ 1/285 BMP-1 model:
Step 9: Tear Down and Cleanup (5 minutes)
I shot Vallejo Airbrush Cleaner through the airbrush, then pulled and cleaned the needle. I emptied thinners and put the paints up. Finally, I cleaned up the workspace.
Total Time — 1 hour.
I estimate that I could have painted 6 models in an hour and 45 minutes, since many steps (cleanup, setup, clean the airbrush, mix paints) take the same amount of time regardless of how many models you’re painting. Still, 20 minutes per model ain’t bad.

