- Supplies Required
- *Step 1: Select Color Scheme
- Step 2: Setup (10 minutes)
- Step 3: Assemble and Mount the Models (20 minutes)
- *Step 4: Prime the Models (15 minutes)
- Step 5: Base Coat (20 minutes)
- Step 6: Apply Camouflage (30 minutes)
- Step 7: Apply Wash (20 minutes)
- Step 8: Paint GEV Windows (5 minutes)
- Step 9: Paint GEV Skirts/Fans (5 minutes)
- Step 10: Spray Flat Coat (15 minutes)
- Step 11: Drybrush Howitzer Barrels (5 minutes)
Speed Painting 6mm Plastic Ogre Miniatures: 27 Models in 2.5 hours (5.5 minutes per model)
My painting techniques are designed to obtain the best results while spending minimal time. There’s a whole universe of gorgeously painted miniatures out there. But I’m a gamer, not a modeler. I don’t have time to spend an hour or more on one model.
Supplies Required
- Models. The models were the AFVs, howitzers and command posts from the new plastic Ogre miniatures from Steve Jackson Games (Set 1):
- 8 x GEV
- 6 x Missile Tanks
- 8 x Heavy Tanks
- 4 x Howitzers
- 1 x Command Post
- Paint. Thinners and Washes
- Paints
- Testors Acryl Black Primer (primer coat)
- Vallejo Desert Sand Surface Primer (basecoat)
- Vallejo Model Air Sandy Brown (camouflage)
- Reaper Master Series High Density Blue Flame (GEV windows)
- Citadel Guilliman Blue Glaze (GEV windows)
- Testors Acryl Light Grey (command post and howitzer base)
- Vallejo Model Air Gunmetal (howitzer barrel)
- Vallejo Model Color Dark Grey (GEV skirts)
- Vallejo Model Color Light Grey (GEV skirts)
- Clear Coat – Testors Model Master Acryl Flat Coat. I prefer to airbrush the Testors acrylic clear because they dry very fast compared with cans.
- Thinners – I use Liquitex Airbrush Thinner to thin acrylic paints for airbrushes. I use my custom airbrush cleaner (50% Isopropyl Alcohotl [91%], 50% Windex, a few drops of glycerine) to clean the airbrush between colors.
- Wash – I use a custom wash made from Future Floor Wax and Vallejo Game Color black ink.
- Paints
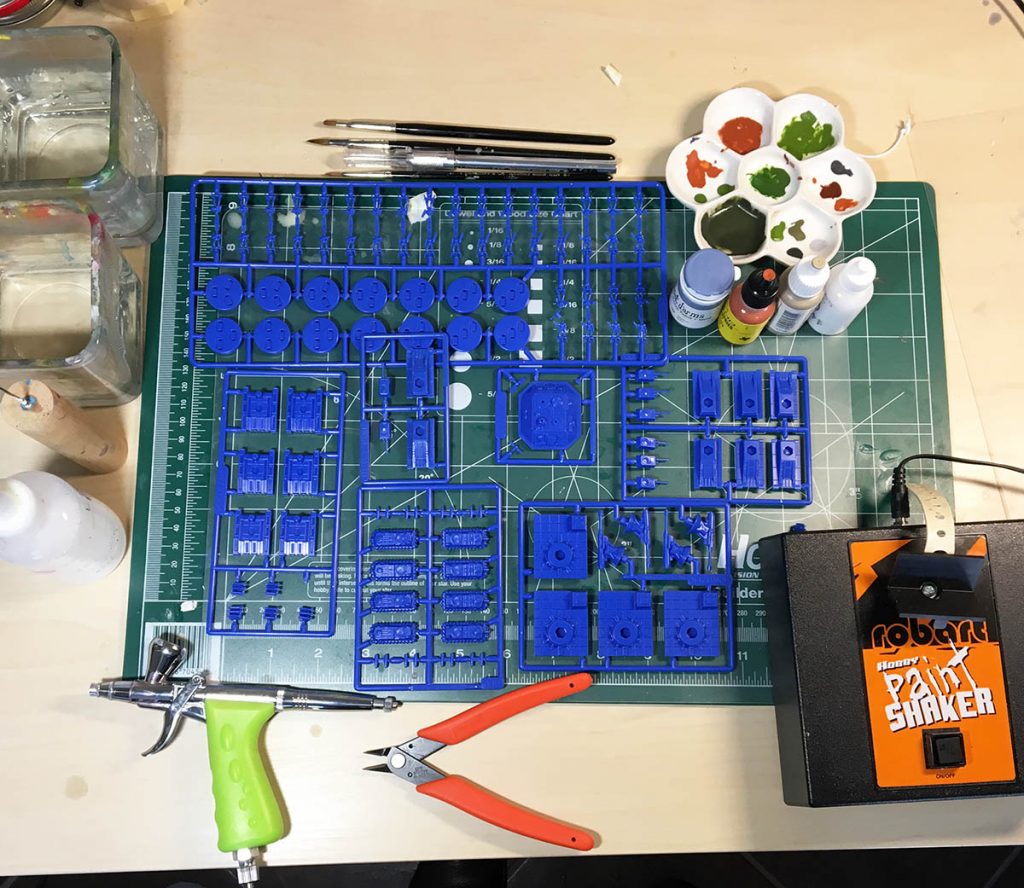
- Tools. I used my trusty Grex Tritium TG3 gravity feed, pistol grip airbrush. As always, paper towels come in handy when working with an airbrush and when using washes. I used an Xacto knife, Xuron sprue cutters and Testor’s liquid model cement to assemble the models.
Note: Asterisked steps are steps that could have been skipped. These steps make the models look a bit more finished in photos, but are barely noticeable on the table. Also, all times are rounded up to 5 minute increments.
*Step 1: Select Color Scheme
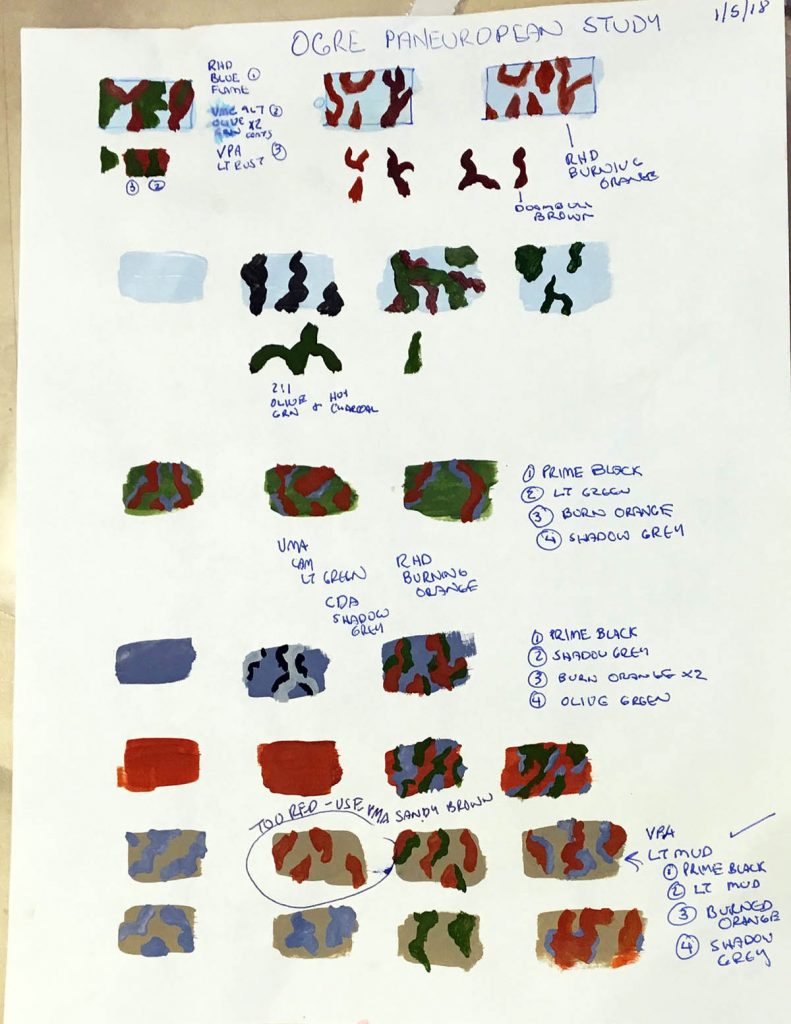
I looked through my camouflage sample notebook (hundreds of top view camouflage schemes, sized for 6mm miniatures). I did a “study” – a sheet of paper with various paint schemes. I decided to use a desert scheme. I do not count this step because it will be amortized over scores of models. It took about 20-30 minutes. After I spayed the basecoat, I decided to airbrush the camouflage instead of applying with a brush.
Step 2: Setup (10 minutes)
Before starting, I assembled all materials and tools I’d need — paint, washes (already pre-mixed), thinners, etc. — and cleared the workspace.
Step 3: Assemble and Mount the Models (20 minutes)
I used Testor’s liquid cement super glue to glue on all turrets and other stuff. The models had no flash and went together easily. The plastic is a little slick and of course, very light. I dropped the GEV engines repeatedly. Next time, I’ll assemble over an open container.
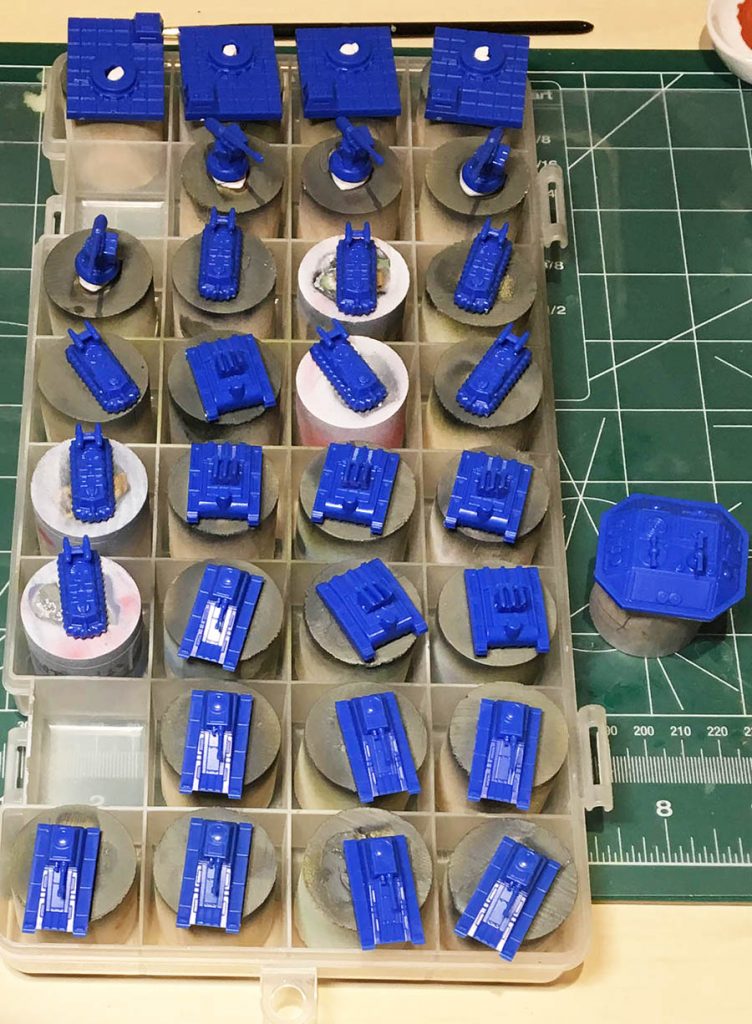
I mounted the models on painting cylinders using poster tack. I put poster tack in the howitzer base holes so that I could later glue the howitzer barrels in. I mounted the howitzer batteries separately,
If you’re gonna paint the GEV fans a different color with an airbrush, you should leave the engines separate. Otherwise, you won’t easily be able to get at the fan with an airbrush.
*Step 4: Prime the Models (15 minutes)
I primed the models with Testors Model Master Acryl Primer Black..
Step 5: Base Coat (20 minutes)
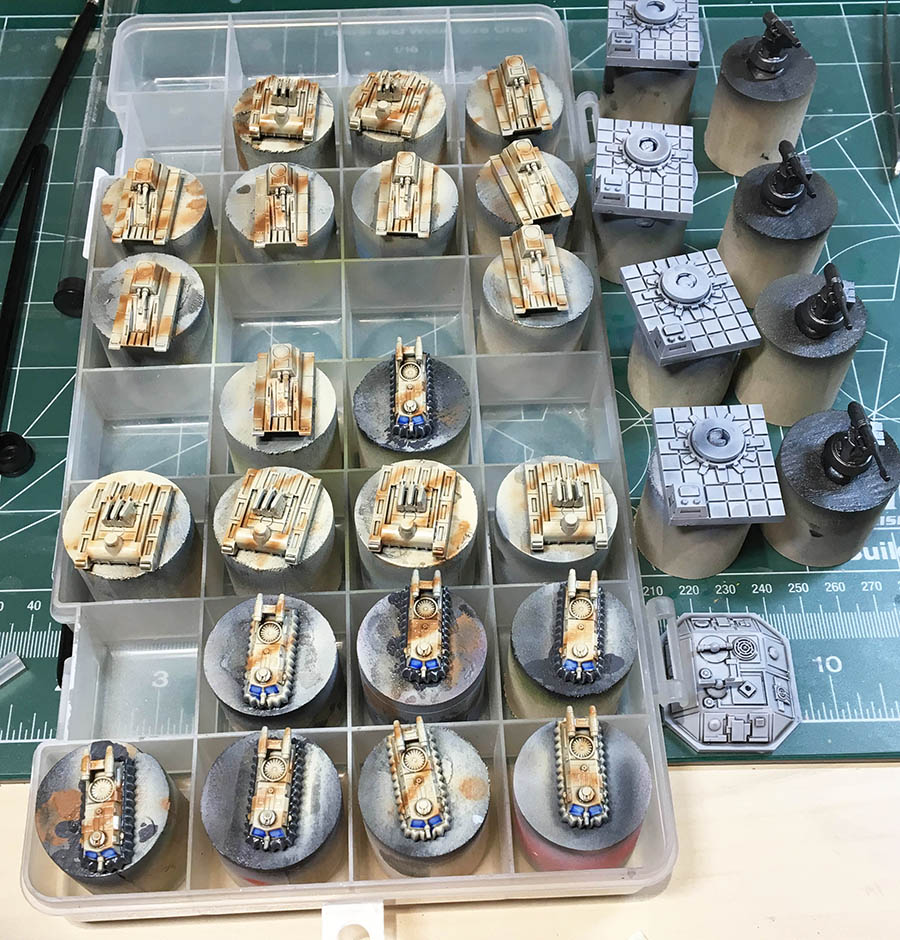
I sprayed Vallejo Desert Sand surface primer on as a base coat. I was careful to only spray the tops of the GEV hover skirts. I sprayed Testors Light Grey as the base coat for the command post and howitzer bases. I sprayed Vallejo Gunmetal as the base coat for the howitzer barrels. I meant to use poster tack to cover the GEV fan blades after the primer. This would’ve kept them black and I intended to drybrush them. However, they ultimately came out fine.
Step 6: Apply Camouflage (30 minutes)
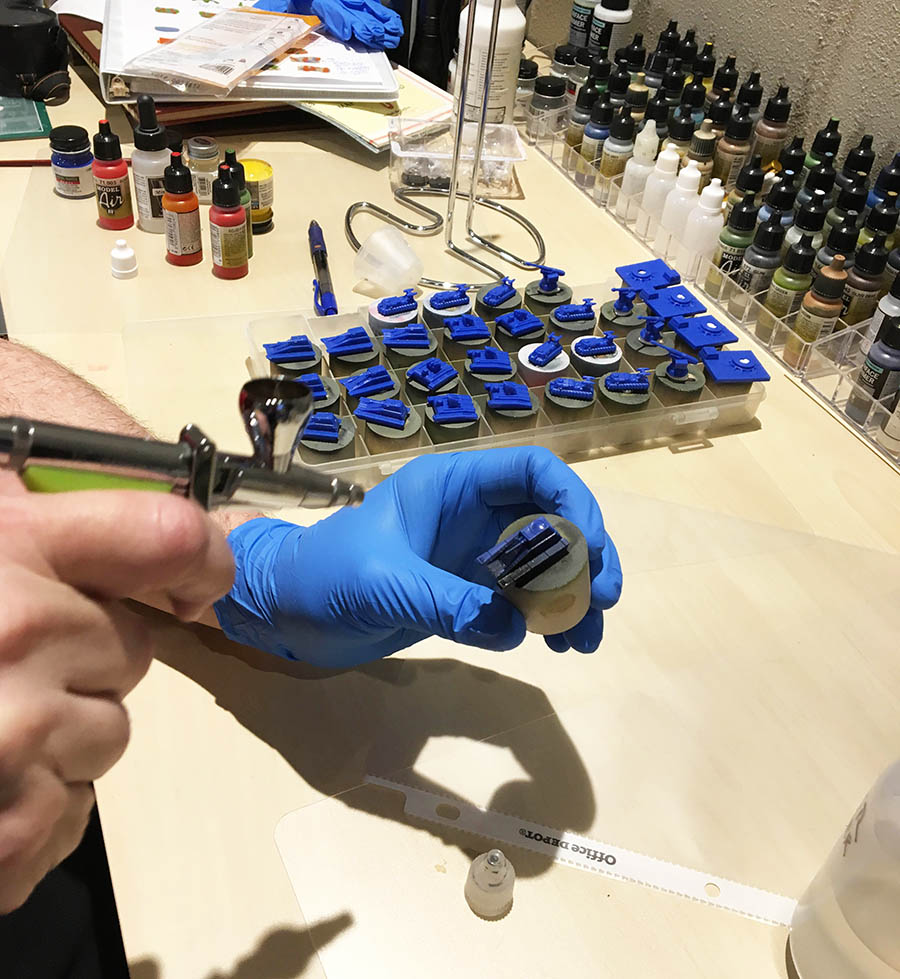
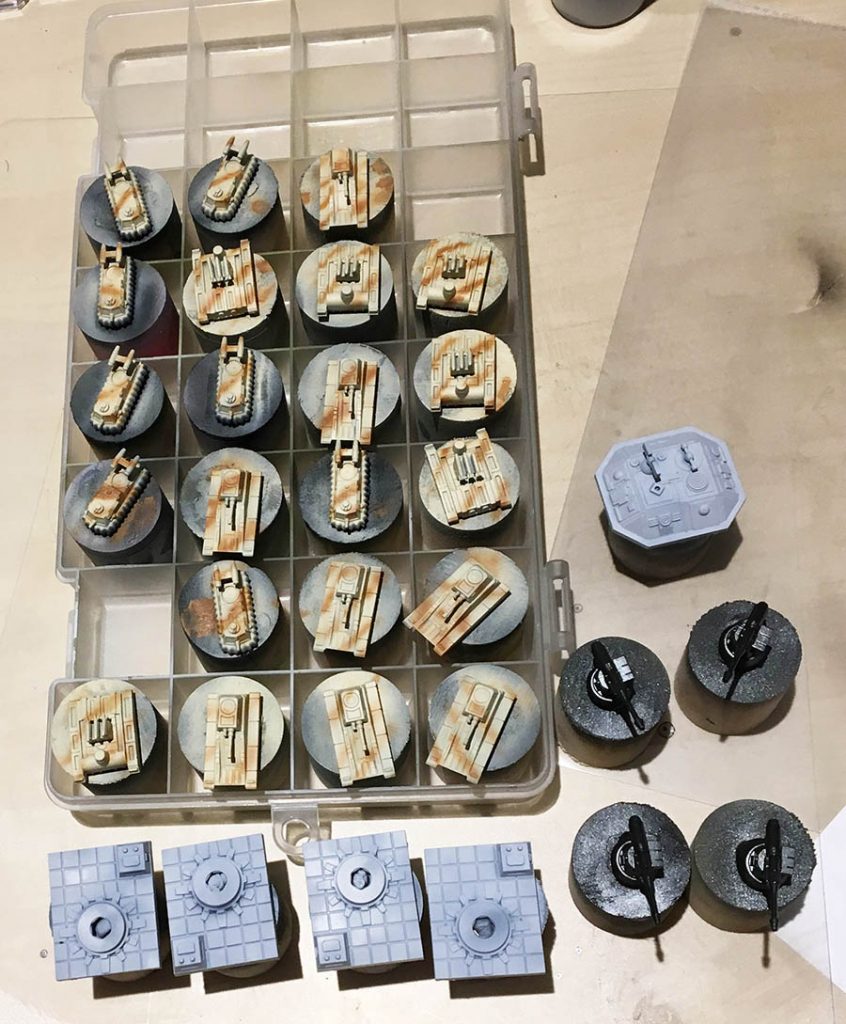
I changed my mind and decided to spray the Vallejo Model Air Sandy Brown camouflage instead of applying it with a brush. This was a frustrating experience as the airbrush began to clog and spit. In the middle of the exercise, I had to tear the airbrush down and deep clean it. Normally the Grex doesn’t give me trouble, but it was uncooperative on this project. The camouflage came out okay, but I’m not really happy with it. Next time, I’ll use my Badger Sotar airbrush to apply camouflage. Or, I’ll brush it on.
Step 7: Apply Wash (20 minutes)
Using my pre-mixed wash, I applied the wash to each model, being careful to keep it from pooling on the large flat areas. The wash takes awhile to dry, so I took a break and straightened up my workbench.
Step 8: Paint GEV Windows (5 minutes)
I painted the GEV windows with Reaper Master Series HD Blue Flame. I then washed them with Citadel Guilliman Blue Glaze.
Step 9: Paint GEV Skirts/Fans (5 minutes)
I painted the skirts on 5 of the GEVs Vallejo Model Color Dark Grey. Then I drybrushed them with Vallejo Model Color Light Grey. I did nothing on the other 3 GEVs. I prefer the look of the 3 GEVs that I left alone.
Step 10: Spray Flat Coat (15 minutes)
I remounted the models onto the painting cylinders and sprayed the models with Testor’s Model Master Acryl flat coat. I sprayed each model individually, which accounts for the time taken.
Step 11: Drybrush Howitzer Barrels (5 minutes)
The flat coat dulled the howitzer barrels, so I drybrushed them with Vallejo Gunmetal.
Step12: Tear Down and Cleanup (5 minutes)
I shot Vallejo Airbrush Cleaner through the airbrush, then pulled and cleaned the needle. I emptied thinners and put the paints up. Finally, I cleaned up the workspace.
Total Time — 2 hours, 20 minutes, 5 1/2 minutes per model.
Addendum – There are several relatively quick enhancements that I could do later:
- Paint missiles a different color (I estimate 9 minutes for 6 models)
- Paint heavy tank guns black, then drybrush with steel color (I estimate 8 minutes for 8 models)
- Paint GEV fans light grey, wash with magic wash (I’d estimate 12 minutes for 8 models).
- Pick out panels on command post in different shades of grey. (5 minutes, maybe).
- Repaint non-barrel components of Howitzers (8 minutes for 4 models).
- Respraying matte coat would take about 30 seconds per model and 5 minutes to clean airbrush.
Doing all of these things would add an hour or so of painting (2+ minutes per model). The models would look a little better, but in the same amount of time, I could paint another 12 models to the current standard. That is the secret of speed painting – figuring out what has the best effect for the least amount of time.
More pictures are in the 6mm Ogre/GEV section.

