- Supplies Required
- Step 1: Setup (5 minutes)
- Step 2: Assemble and Mount the Models (30 minutes)
- Step 3: Prime the Models (15 minutes)
- Step 4: Base Coat (20 minutes)
- Step 5: Austral Camouflage 1 (35 minutes)
- Step 6: Austral Camouflage 2 (20 minutes)
- Step 10: Detail Cannon (5 minutes)*
- Step 11: Detail Tracks (30 minutes)*
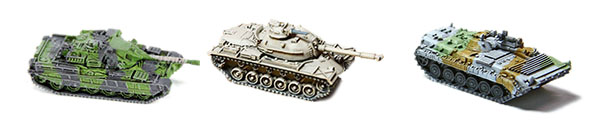
Speed Painting 6mm AFVs: 55 Models in 4.5 hours (5 minutes per model)
My painting techniques are focused on obtaining the best results while spending minimal time. I’m a gamer, not a modeler. My preferred scale for modern ground combat is 1/285 (6mm) scale and my techniques are optimized for that scale.
Supplies Required
- Models. The models were mostly GHQ. The GHQ BMP-2s were rehabbed 28 year old GHQ. A few rehabbed 28 year old Heroics Ros BMP-2s and rehabbed 20 year old CinC AMX-30s. Models were:
- Austral (21 models)
- 3 x GHQ BMP-2 rehabbed
- 3 x H/R BMP-2 rehabbed
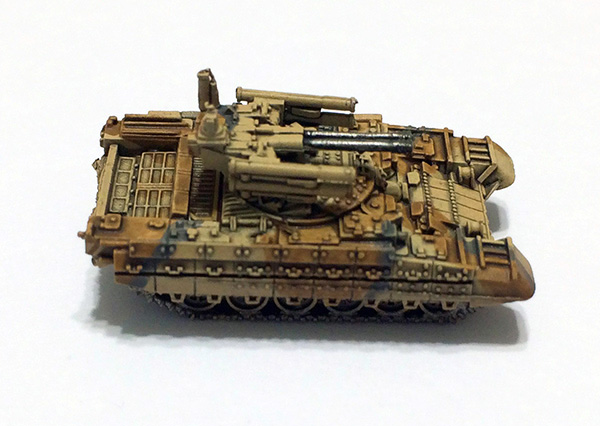
- 3 x GHQ BMP-T
- 3 x GHQ BTR-T
- 3 x GHQ T-72 M1
- 3 x GHQ T80 w/Reactive Armor
- 3 x GHQ T90
- Saudi Arabia (34 models)
- 9 x CinC AMX-30 rehabbed
- 5 x GHQ AMX-30B2
- 10 x GHQ M1A1
- 10 x GHQ M2A2
- Austral (21 models)
- Paint Stripper. Rehabbed models were stripped with Purple Power cleaner.
- Paint. Thinners and Washes
- Austral
- Base – Vallejo Model Air Desert Sand
- Camouflage 1 – Citadel Talarn Sand
- Camouflage 2 – Citadel Mechanus Standard Gray
- Saudis
- Base – Testors Model Master Acryl Panzer Interior Buff
- Tracks/Guns
- Vallejo Model Colors Grey Black
- Old Citadel Boltgun Metal
- Primer – Testors Model Master Acryl Primer White
- Clear Coats – Testors Model Master Acryl Flat Coat and Testors Model Master Acryl Gloss Coat. I prefer to airbrush the Testors acrylic clear because they dry very fast compared with cans.
- Thinners – I use Liquitex Airbrush Thinner to thin acrylic paints for airbrushes. I use denatured alcohol to clean the airbrush between colors and Vallejo Airbrush cleaner to clean the airbrush at the end.
- Wash – I use a custom wash made from Future Floor Wax and Vallejo Game Color black ink.
- Austral
- Tools. I used my trusty Grex Tritium TG3 gravity feed, pistol grip airbrush. As always, paper towels come in handy when working with an airbrush and when using washes.
Note: Asterisked steps are steps that could have been skipped. These steps make the models look a bit more finished in photos, but are barely noticeable on the table. Also, all times are rounded up to 5 minute increments.
Step 1: Setup (5 minutes)
Before starting, I assembled all materials and tools I’d need — paint, washes (already pre-mixed), thinners, etc. — and cleared the workspace. I ran alcohol through the airbrush to make sure it wasn’t clogged. It was, so I spent a couple of minutes getting it working.
Step 2: Assemble and Mount the Models (30 minutes)
I used super glue to glue on all turrets and other stuff. The BMP-T was pretty fiddly, I left the machineguns off the GHQ M1A1s. They are entirely too flimsy and will break off easily. I found the gun barrels of the GHQ M2A2s to be bent into U-shapes in the packaging (!). This made them very hard to straighten and I didn’t really succeed in that task. I mounted the models on painting cylinders using poster tack.
Step 3: Prime the Models (15 minutes)
I primed the models with Testors Model Master Acryl Primer White. After each color, I shot alcohol through the airbrush to clean it.
Step 4: Base Coat (20 minutes)
The base coat for the Austral forces is Vallejo Model Air Desert Sand, sprayed on with the airbrush. The base coat for the Saudis is Model Master Acryl Panzer Interior Buff. Model Air and Model Master Acryl colors require no thinning, so they are easy and fast to work with.
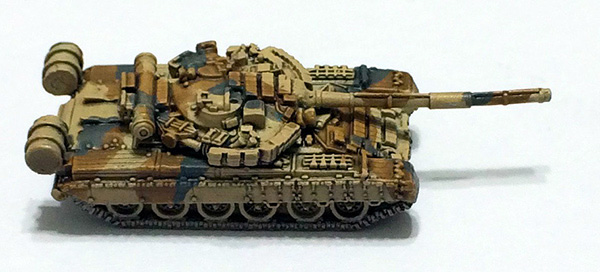
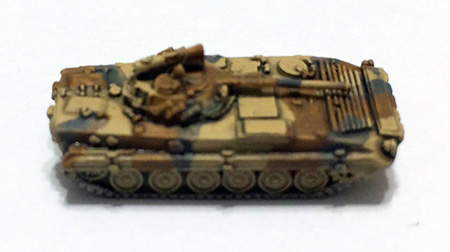
Step 5: Austral Camouflage 1 (35 minutes)
I thinned some Citadel Talarn Sand with about 1 part Liquitex airbrush thinned to two parts pain. I applied the paint to the Austral AFVs with a brush.
Step 6: Austral Camouflage 2 (20 minutes)
I thinned some Citadel Mechanus Standard Grey with about 1 part Liquitex airbrush thinned to two parts pain. I applied the paint to the Austral AFVs with a brush.
Step 7: Apply Gloss Clear Coat (10 minutes)*
I sprayed all the models with Testors Model Master Acryl Clear Gloss. This coat was applied quickly to the top surfaces only.
Step 8: Apply Wash (60 minutes)
Using my pre-mixed wash, I applied the wash to each model, being careful to keep it from pooling on the large flat areas. The wash takes awhile to dry, so I took a break and straightened up my workbench.
Step 9: Flat Coat (30 minutes)
I remounted the models onto the painting cylinders and sprayed the models with Testor’s Model Master Acryl flat coat. I sprayed each model individually, which accounts for the time taken.
Step 10: Detail Cannon (5 minutes)*
I painted the BTR autocannon and the MBT machineguns and small cannon Vallejo Model Colors Grey Black, then touched them up with Citadel Boltgun Metal.
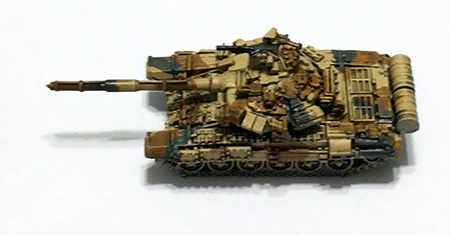
Step 11: Detail Tracks (30 minutes)*
I painted the tracks with Citadel Boltgun Metal. This completed the models:


Step12: Tear Down and Cleanup (5 minutes)
I shot Vallejo Airbrush Cleaner through the airbrush, then pulled and cleaned the needle. I emptied thinners and put the paints up. Finally, I cleaned up the workspace.
Total Time — 4 hours, 25 minutes, less than 5 minutes per model.