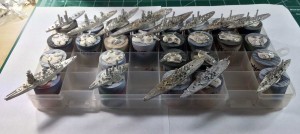
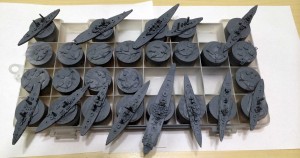
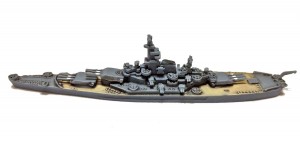
Painting 1/2400 Scale Battleships This is my guide for speed painting 1/2400 scale ship models. Although there are 11-15 steps, this technique is still very fast. It also rewards painting larger batches. I can typically paint 20 models in 3-4 hours. I use an airbrush, but there’s no reason these techniques won’t work with canned spray paint or brushed paint. If you brush, be sure to thin the paint so that detail isn’t obscured.
- Items Required
- Testors Model Master Acryl White Primer (#4622) for priming model.
- Testors Model Master Acryl Dark Gray (#4754) for hull/superstructure.
- Vallejo Panzer Colors Light Mud for decks.
- Flat white (or white primer) for ship’s boats.
- Flat black for funnels.
- Testors Model Master Acryl Flat Clear.
- Basic Wash – 1 oz. per 8 ships.
- (Optional) Camouflage colors.
- (Optional) Testors Model Master Acryl Gloss Clear.
- (Optional) 1/3 Testors Model Master Acryl Dark Gray and 2/3 Flat White mix for highlight color. Thin for airbrush if you’re going to use an airbrush for highlighting.
- Airbrush thinner.
- Airbrush cleaner.
- Paint brushes.
- Paper towels.
- Basic Wash recipe. Basic wash recipe – 1 oz. Future floor wax with 1 drop of water based permanent black ink. I use old Games Workshop black ink or Winsor and Newton black ink. It’s very important to test this before using it. The ink should evenly tint the Future. Some pigmented inks don’t work well. Daler-Rowney is one brand to avoid.
- Primer Alternatives. I spray Testors Model Master Acryl White Primer with an airbrush. Instead, you can prime with a brush. There are also other options for the type of primer:
- Another brand of white primer, either brushed on or sprayed on.
- Black primer, either brushed on or sprayed on.
- Testors Model Master Acryl Gray Primer. It’s a little lighter than the deck color. You can add a little black ink to make it match the basecoat, then skip the basecoat step.
- Army Painter Uniform Grey in spray can. If it’s a close match for the basecoat, you can skip the basecoat step.
- Another brand of gray primer, either brushed on or sprayed on. If it’s a close match to the basecoat, you can skip the basecoat step.
- Clear Coat Alternatives. I spray Testors clear coats with an airbrush, but you can use any other clear coat you want. Do not use Future as the gloss coat however.
- Highlighting Comments. Highlighting can be time-consuming and I’m not sure that it’s worth the effort. If you decide to highlight, here are your options:
- Use an airbrush with highlight color (or light gray spray can) to mist the model.
- Drybrush with highlight color. I struggle with this technique; the finish is too rough for my tastes.
- Use a brush to do “edge highlights” on edged surfaces with highlight color. You’ll need to be sure to thin the paints.
- Workspace Preparation
- I think that the preparation step is the most important step in maximizing output. Everyone has their own rituals, so the list below is merely how I do it. But if you are painting 10-20 models in a batch, preparation will save you huge amounts of time. This normally takes me 10-15 minutes. I’d waste far more time (and possibly mess up paint jobs) if I didn’t do it.
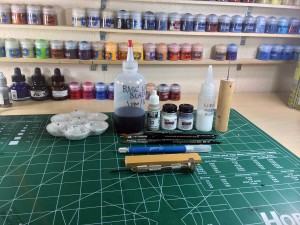
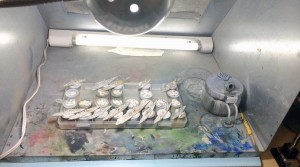
- Clear and provision an appropriately sized workspace. I put out tools – hobby knife, file and putty for assembling the model. I put out the bottled paints and ink I’ll be using, along with wash water, thinner for the paints, a palette and a paper towel. I also put a rack of painting stands out and check the blue-tack to make sure it’s still good. (See my website for info on my paint stands). Remove anything else from the workspace.
- Pre-mix plenty of Base Wash. In my experience, 1 oz. will cover 8 battleships. I actually keep a 4 oz squeeze bottle with it already mixed.
- Pre-mix and thin the colors you’ll be airbrushing. I put them in dropper bottles so I can put them directly into my airbrush. Be sure you have plenty of airbrush cleaner (I use alcohol during painting and lacquer thinner at the end to clean. If the brush is cranky, I use lacquer thinner after each color).
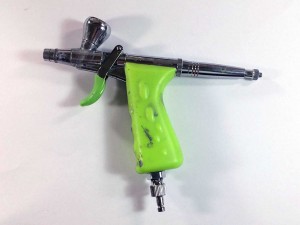
- Check airbrush and make sure it will spray. Clean airbrush if necessary. It usually is. This is my airbrush of choice, the Grex Tritium TG3:
- Model Preparation
- Sometime before the session, wash the models in warm soapy water for 20 minutes. Let them air-dry.
- Clean and assemble model. Putty if necessary. Do not glue turrets on. Write ship class on bottom of hull with Sharpie marker.
- Mount model and turrets on painting stands. (Be sure to mark which turrets go with which ship). Make sure models are secure.
- Painting Steps
- Prime the model.
- Paint hull and turrets with gray basecoat.
- (Optional) Highlight the superstructure and turrets.
- (Optional). If you want to paint ship camouflage, this is the time to do it.
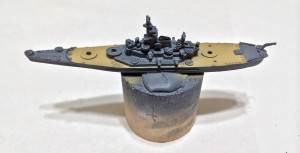
- Airbrush the deck (if your airbrush is capable of fine lines and if you have the skill to do it). This gets a very even coat, but there will be some overspray on the gray parts, which will need to be touched up later.
Or, you can brush paint the deck. You’ll probably need to put several coats on to get even coverage. I find that a flat edge brush makes it easier, but use whatever brush works for you. If you get a little messy and get the deck color on the gray parts, don’t worry about it. You’ll correct that in a later step. If you get a lot of deck color on the gray parts, you’ll need to touch that up in this step.
- If you airbrushed the deck, touch up the overspray.
- Paint the top of the smokestacks black.
- Paint the ships boats white.
- (Optional) Spray the entire model with a clear gloss coat.
- You can skip this step, but you will do a little more touch up work after you apply the wash below. (The gloss coating helps keep the wash from staining raised areas). I’m undecided whether this step actually saves time and am considering deleting it.
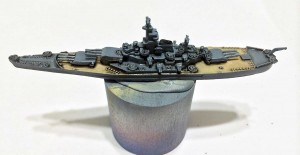
- Using a brush, liberally apply the basic wash to the deck and superstructure of the model. Put the model on a paper towel to avoid contaminating your blue-tack with Future. To minimize touch up, be sure to soak the wash up so that it does not stain large flat areas. While the wash is wet, do this with a drier brush or the edge of a paper towel. If the wash is tacky, use plain Future floor wax to remove the wash. If the wash has dried, you can use Windex, but be careful as it may remove the underlying paint as well. Cleaning the wash from flat areas in this stage will save the most time later on.
- (Optional) After the wash is dry (this takes a lot longer than acrylic paints normally take), spray with a matte clear finish. I use Testor’s Model Master Acryl Flat Clear.
- This step is in preparation for the touch-up step below. I find that it is easier to touch up flat areas than glossy areas. If you are very diligent at working with the wash and keeping it from pooling in large flat areas, you can skip this step.
- Touch up with a brush:
- Flat superstructure or deck areas where the wash pooled.
- The side of the hull. (Usually, the deck colors and the wash will get on the hull as well).
- The sides of the superstructure where the deck colors covered them.
- You may need to touch up the ship’s boats.
- Even out any highlights if you wish.
- Pick out remaining details:
- Put a white dot at the base of each main gun.
- I place a white dot on the model to show where line of sight is traced in my games.
- Spray with a matte clear finish. I use Testor’s Model Master Acryl Flat Clear.

